SPRING SEMESTER 2023 REGISTRATION GUIDE
Adding a class
This article covers how CSUF students can enroll in a class.
Be sure to review the
Registration Calendars
![]() to check when you can enroll in classes using this process. Deadline is Monday February 6, 2023.
to check when you can enroll in classes using this process. Deadline is Monday February 6, 2023.
Note that you can use the Class Search and Enroll feature to view available classes prior to registering. This allows you to add a course to your favorites and save time locating it later when you are ready to register.
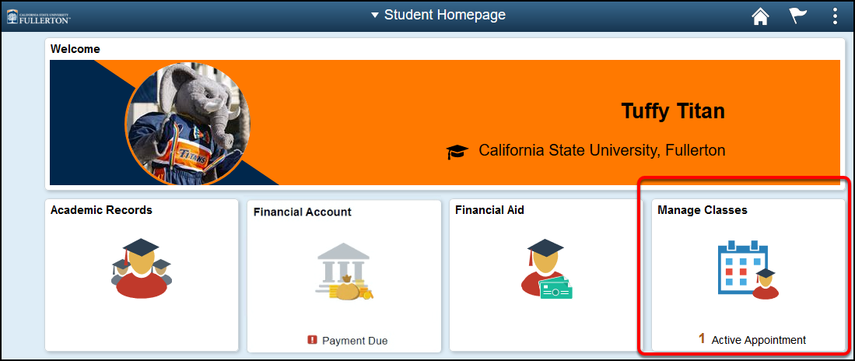
1. Log in to the campus portal and access the Student Homepage in Titan Online.
View step-by-step instructions on how to access the Student Homepage.
2. Click on Manage Classes.
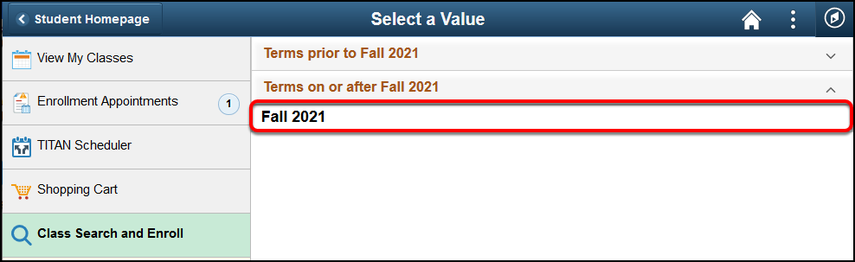
3. Click on Class Search and Enroll in the left menu.

4. Select the term for which you want to enroll.
5. Enter a keyword for the search and then click the double arrow button to search. Or use additional search options, favorites, or recently viewed to locate a class.
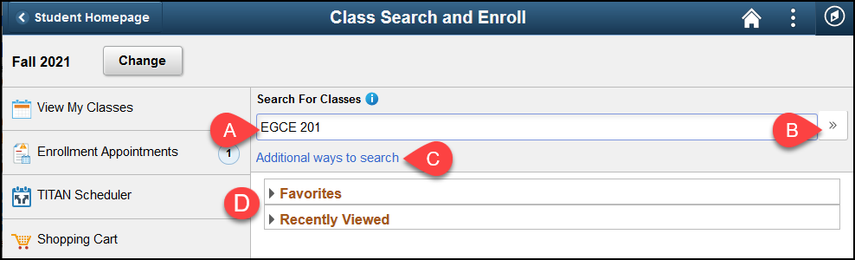
- Enter a keyword for the search such as the course, subject, class, or topic.
- Then click the double arrow button to search.
- Click Additional ways to search to search by a list of available subjects, catalog number, or Instructor last name.
- If you have marked a course as a favorite or viewed courses, you can expand Favorites or Recently Viewed to view and select them.
Additional ways to search
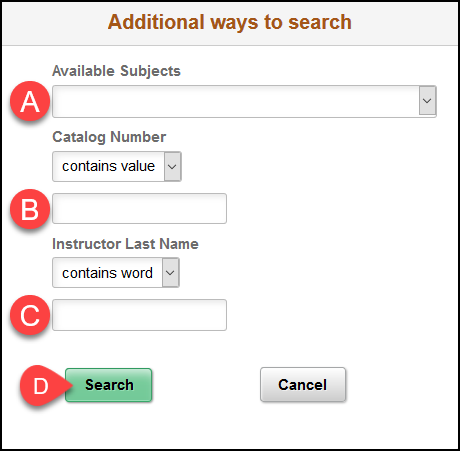
- Available Subjects: Allows you to choose a specific course subject (e.g., American Studies, Psychology)
- Catalog Number} Allows you to enter the number of the course (e.g., 101, 200, 305).
- Instructor Last Name: Allows you to search for a specific instructor by their last name.
- Search Button
6. Choose a search result to view available class options. You can also use the filters on the left to narrow down your results.
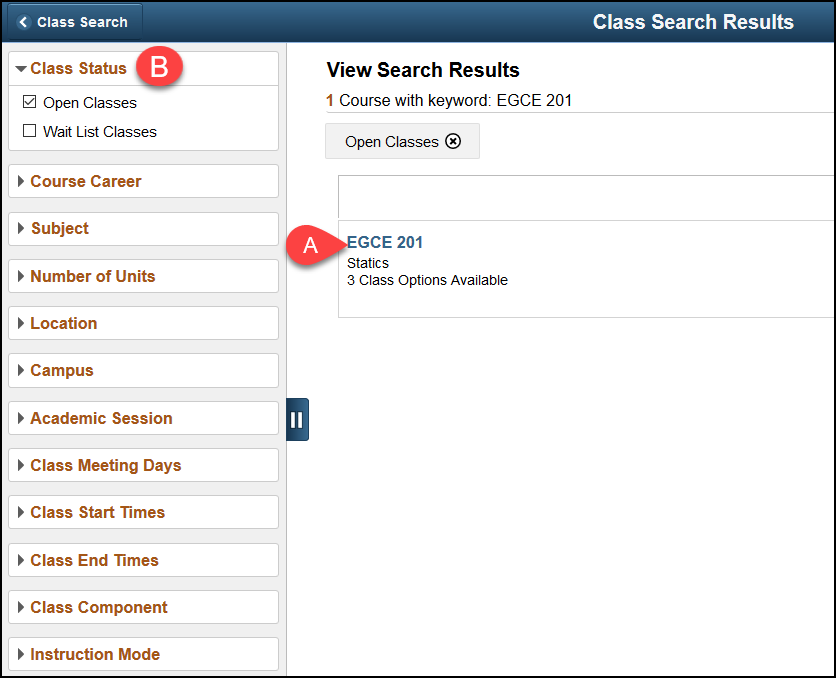
- Click on a search result to view available class options.
- You can use the filters on the left to narrow down your search results. For example, you could change the Class Status to show both Open Classes and Wait List Classes.
7. Click on the class section you want to enroll in. Or use other links on the page to view more details about the class section and the course or add the course to your favorites.
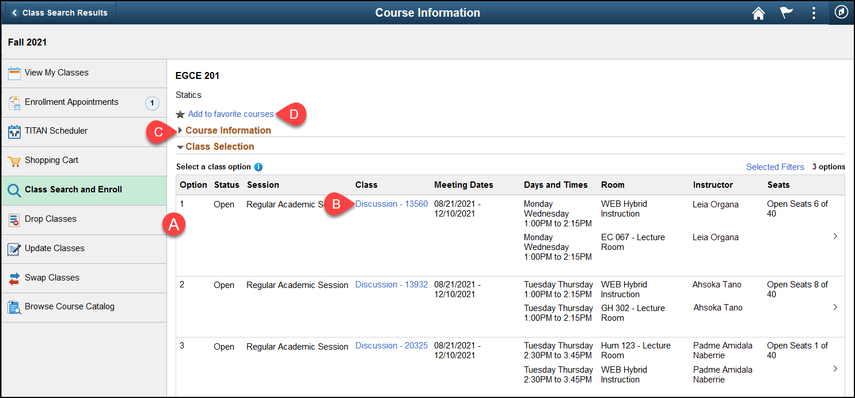
A. Click on the class section you want to enroll in.
B. For more information about the class section including meeting times and pre-requisites, click on the link in the Class column.
C. Expand Course Information to view the course description, number of units, and other course details.
D. Click Add to favorite courses to add this course to your favorites.
8. Review the class section details, including the meeting days and times as well as the final exam schedule. Check the Option Status to see the current status of the class section (Open, Wait List, Closed) and the Seats for the number of open seats left. Then click Next.
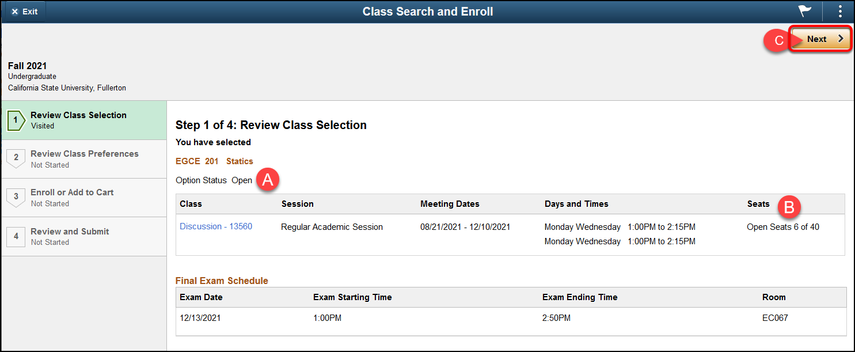
A. Check the Option Status to see the current status of the course: Open, Wait List, or Closed.
B. Check the Seats to see the current number of open seats or waitlist available places in the class.
C. Click Next to continue registering.
9. If prompted, select your waitlist, grading basis, or units preferences. Then click Accept.
If the class status says Wait List, you must select Yes for the waitlist option in order to complete enrollment.
If there are only a few open seats left in the class, you may want to select Yes for the waitlist option in case all of the open seats are filled by the time you complete your enrollment.
If you do not have the option to be added to a waitlist, change your grading basis, or change the number of units for the class, you will not see this screen.
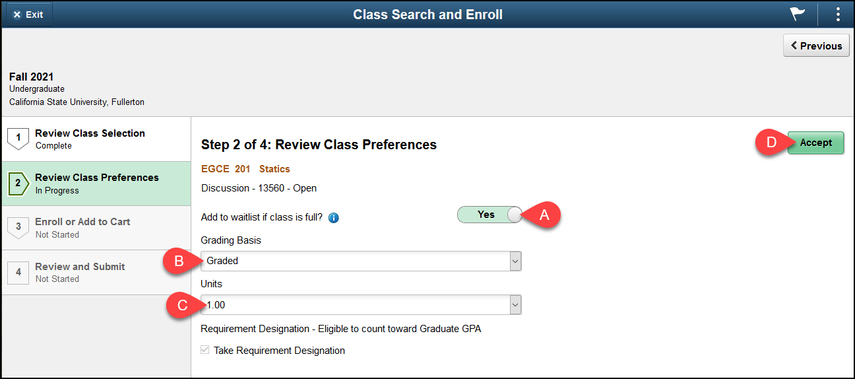
The Credit/No Credit option is often abbreviated, such as Undergraduate - CR/NC Stdnt Opt.
A. If available, use the slider to indicate if you want to be added to the wait list for a class.
B. If available, select your grading basis: Graded or Credit/No Credit.
C. If available, select the number of units to be applied to the class.
D. Then click Accept.
10. Select either Enroll or Add to Shopping Cart. Then click Next.
Placing a class in your shopping cart does not save your place in the class. You must complete the enrollment process for your place in the class to be saved.
If there is a co-requisite for the course (e.g., you must enroll in a laboratory class in addition to the regular class), you will want to use the shopping cart as the system will not allow you to enroll in only one of the two required classes.
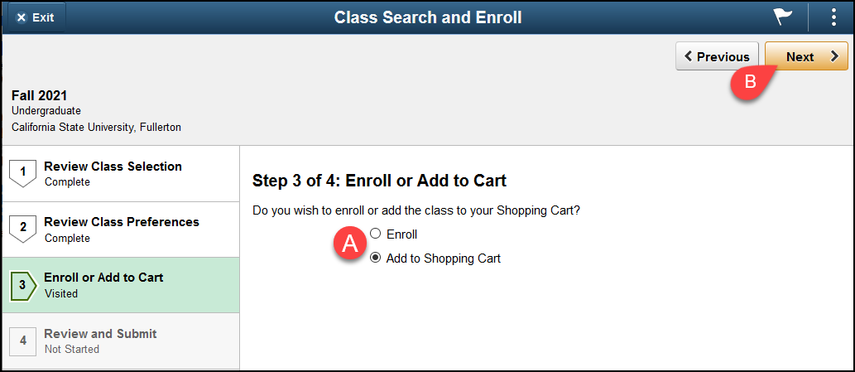
A. Choose Enroll to enroll in the course now. Or choose Add to Shopping Cart if you want to add multiple courses to your shopping cart and then enroll in all of them at the same time.
B. Then click Next.
11. Review the class section information and preferences. Then click Submit to continue in the class or adding it to your shopping cart.
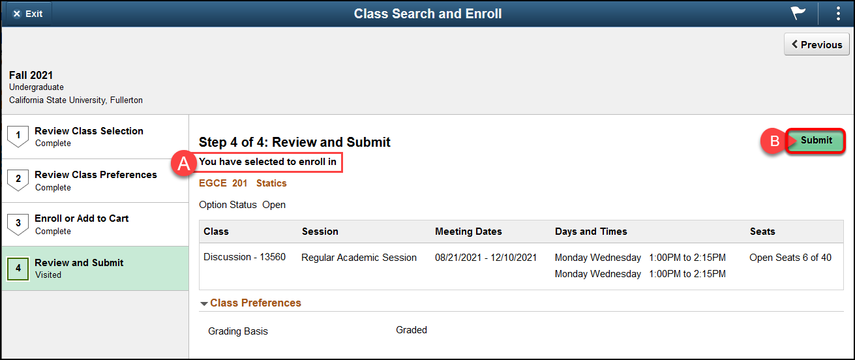
A. If you chose Enroll, you will see "You have selected to enroll in"; if you chose Add to Shopping Cart, you will see "You have selected to add to your shopping cart."
B. Click Submit to continue enrolling in the class or adding it to your shopping cart.
Click Yes to confirm you want to submit.
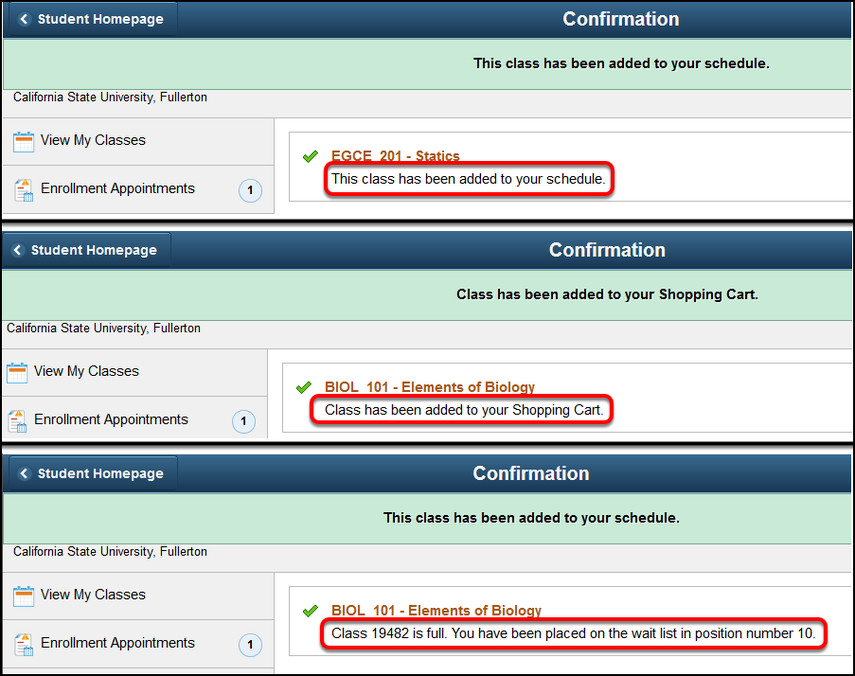
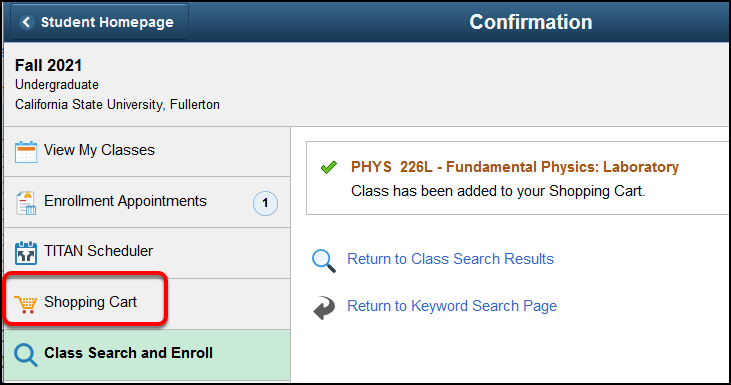
12. You'll see a confirmation screen that will confirm that the class was added to your schedule, added to your shopping cart, or you were placed on the wait list. If you chose to enroll, you are done! If you chose to add the class to your shopping cart, continue with the steps below to finalize your enrollments.
13. Continue to add classes to your shopping cart using the steps above. When you are ready to enroll, click on the Shopping Cart link on the left menu.
14. Place a checkmark next to each class you want to enroll in. Then click Enroll.
You do not need to enroll in all classes in your shopping cart at once. However, keep in mind that your place in the class is not saved until you complete the enrollment process.
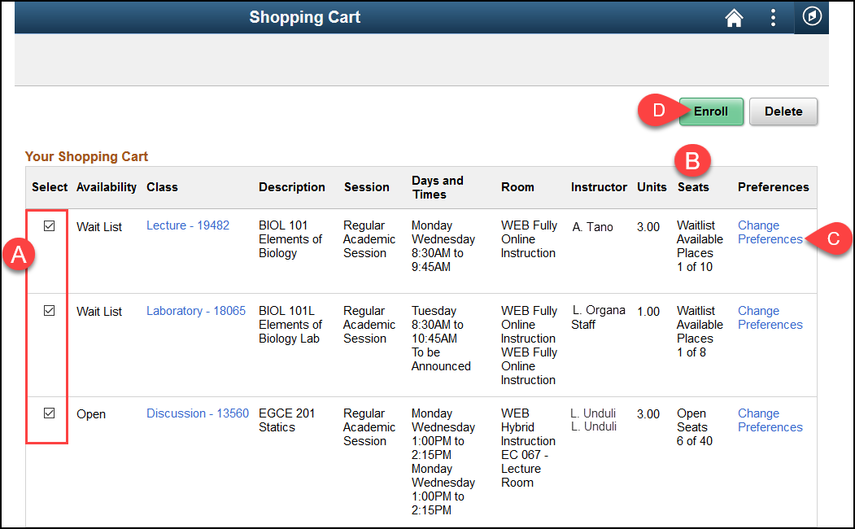
A. Place a checkmark next to each class you want to enroll in.
B. You may want to check the Seats column to check that there are open seats or waitlist available places.
C. Click Change Preferences if you want to change your grading basis option or waitlist preference (if available).
D. Then click Enroll.
Click Yes to confirm that you want to enroll in the class(es).
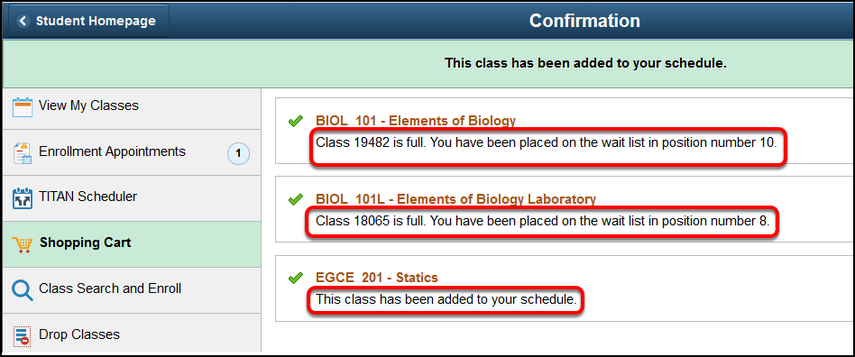
15. You'll see a confirmation screen that will confirm that the classes were added to your schedule or you were placed on the waitlist. You're done!
Need more help?
Questions about registration/registering for classes?
Contact the Registration and Records Office at arsc@fullerton.edu or 657-278-7601. Or visit LH-114.
Technical issues in accessing Student Homepage or your campus portal account?
Contact the Student IT Help Desk at StudentITHelpDesk@fullerton.edu or 657-278-8888